Downloading installer
You can download the Windows Admin Center installer on the Microsoft web page.
Windows Admin Center | Microsoft Evaluation Center
Installing WAC
Note: You cannot install the WAC on a domain controller!
Start the installer and click you through the installer.

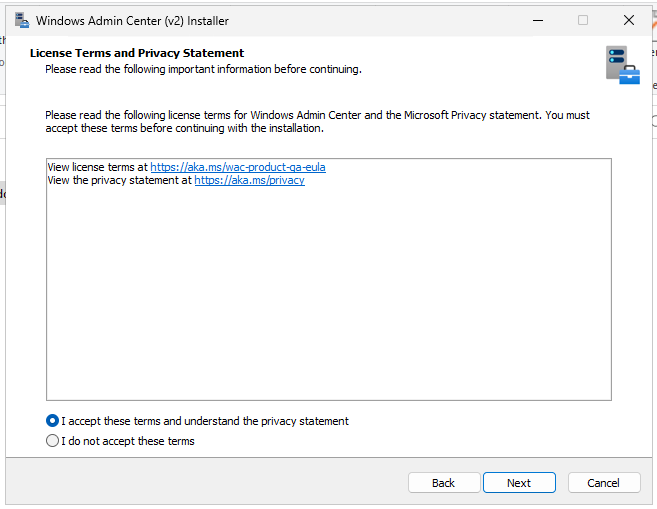
Accept the license terms.
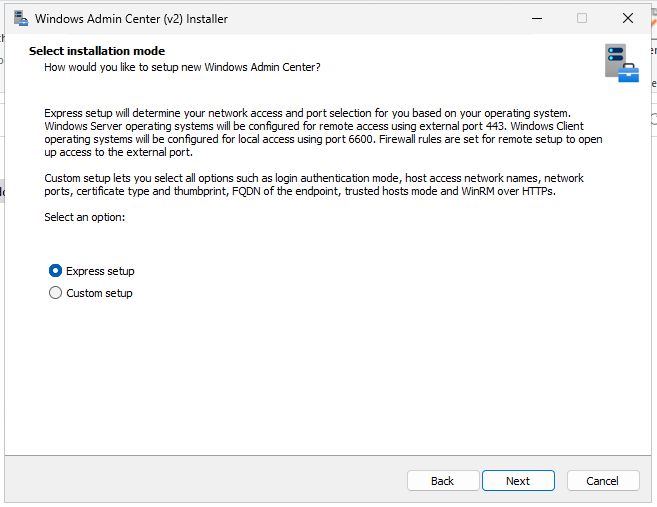
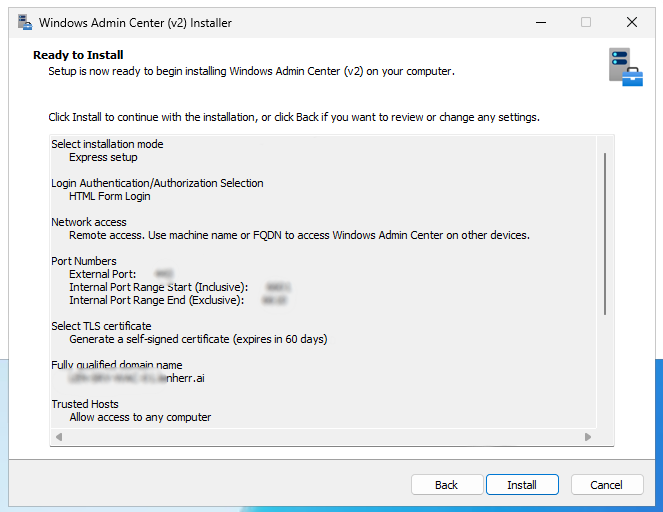
I chose the express setup here, but if you plan to change one of these settings, you choose custom setup:
- network access
- port numbers
- TLS certificate types and thumbprints
- the fully qualified domain name of the endpoint
- trusted hosts mode
- WinRM over HTTPS
If you want to use your own certificate, choose the upper option. The “easier” way is to generate a self-signed certificate.
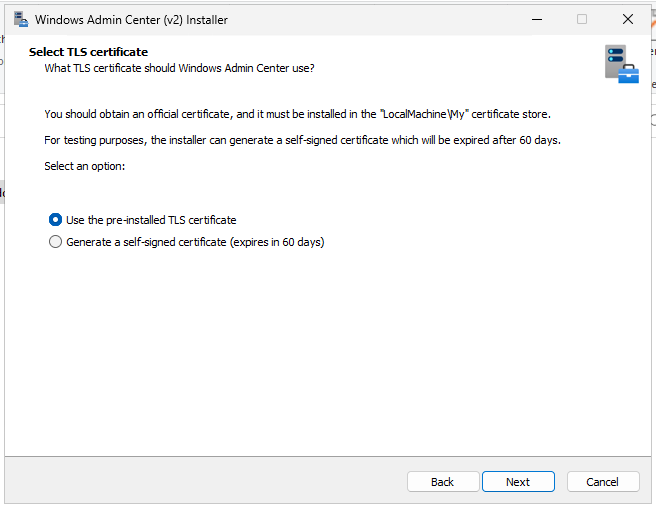
If you want to use your own certificate
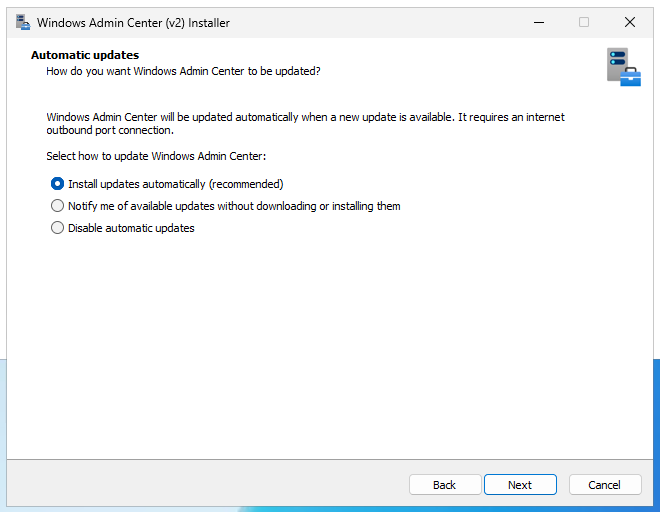
Make your choice to automatic updates, I leave this at automatically, so we get the latest udpates and enhance our security hopefully.
Overview your settings and click install.
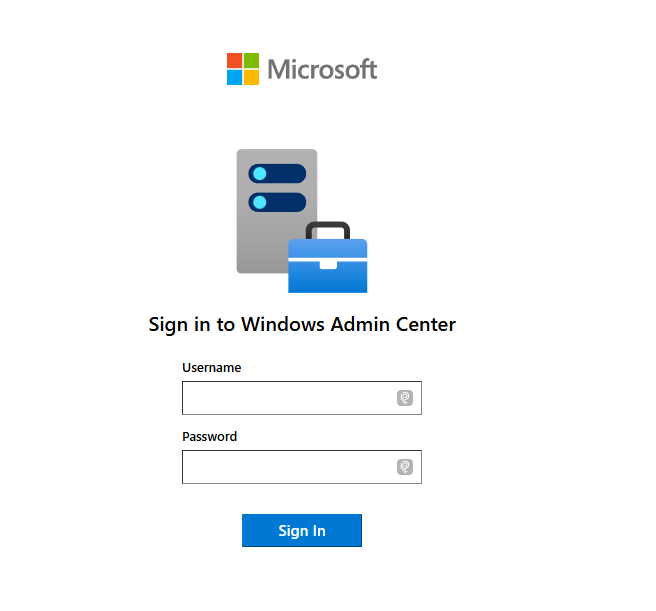
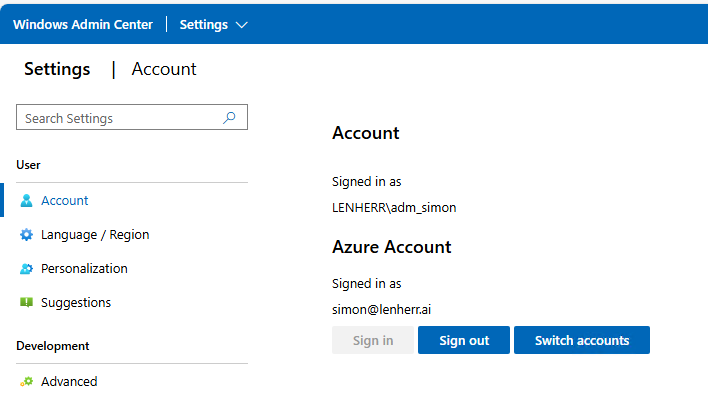
Log in
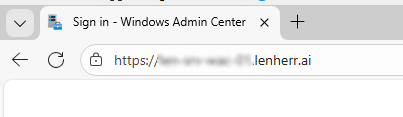
Go to https://<fqdn> and log in with your account, in my case my personal domain admin.
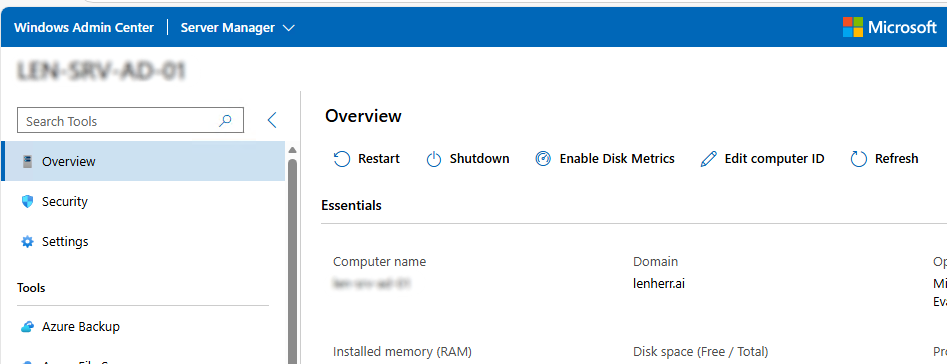
And you’re in! Here you see an overview over your environment.
Change the certificate
I had some issues to assign my domain certificate in the installation process. So what I did was, I finished the installation with the self-signed certificate and changed the certificate after.
After the installation I open a new PowerShell window and load the WindowsAdminCenter Module.
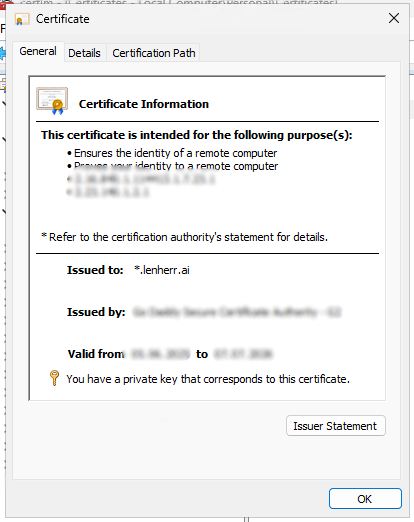
Import-Module "$env:ProgramFiles\WindowsAdminCenter\PowerShellModules\Microsoft.WindowsAdminCenter.Configuration"Code language: PowerShell (powershell)The I copy the thumprint of my certificate out of certlm.msc and paste it into this command.
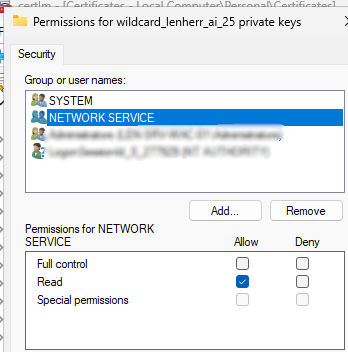
Set-WACCertificateSubjectName -Thumbprint "THUMBPRINT"Code language: PowerShell (powershell)Then we have to manage the permission to read this private key. We open certlm.msc go into the “Personal” store und under “All Tasks” we click on “Manage private keys“
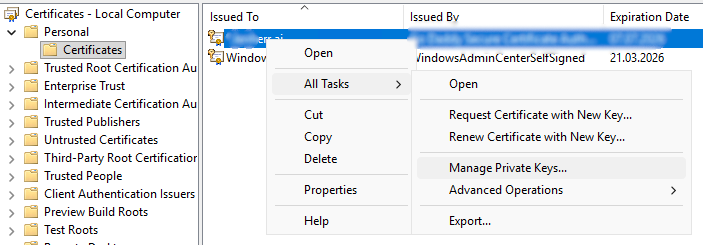
And grant the “Network service” user “Read” permission for the private key.
After we have done that, we switch to PowerShell and restart the WAC service.
Restart-Service -Name "WindowsAdminCenter"Code language: JavaScript (javascript)Now we connect to our WAC webpage to check if the certificate works, and as you can see we got that lock which signals that the domain certificate was successfully applied.
We now have successfully configured a new certificate for our Windows Admin Center instance.
Register WAC with Azure
To enable a hybrid scenario we now want to link our Windows Admin Center instance to Azure. In a real environment there are many benefits like:
- Azure Monitor -> push the on-prem logs to Azure and have there a consolidated place for all your logfiles
- Azure backup -> back-up your on-prem servers and system states directly to the cloud
- Azure Site Recovery (ASR) -> replicate your on-prem machines to Azure for disaster recovery
To do so, we connect to our WAC instance go to settings in the top right corner and click on the blade “Register”
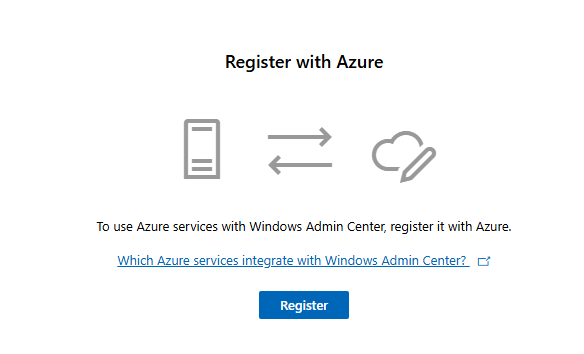
We follow the instructions until it more or less looks like this.
After this configuration we click on “Sign in” and sign in with our Azure account.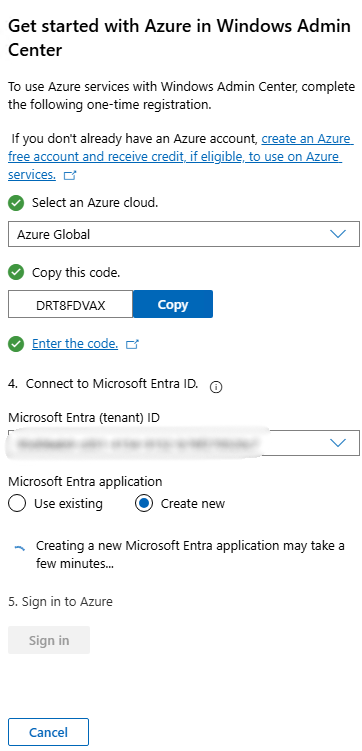
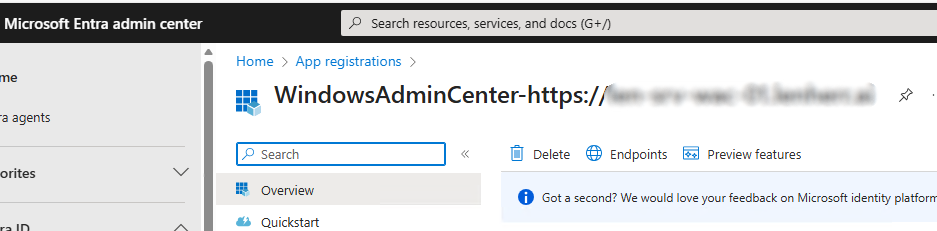
And we already got the connection established between our on-prem WAC instance and our Azure environment!
To check what happened exactly we can open the Microsoft Entra Admin Center. Under “App registrations we should see a WindowsAdminCenter application registration.
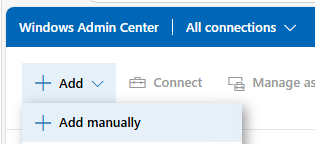
Add a server
Now you can add your servers to your WAC instance for remote management.
You have the following option to add:
- Add a Server
- Add a Windows PC
- Add a serverr cluster
- Add an Azure VM
In my case we add a server, type in the information like the hostname and with DNS resolution in place your server should get found.
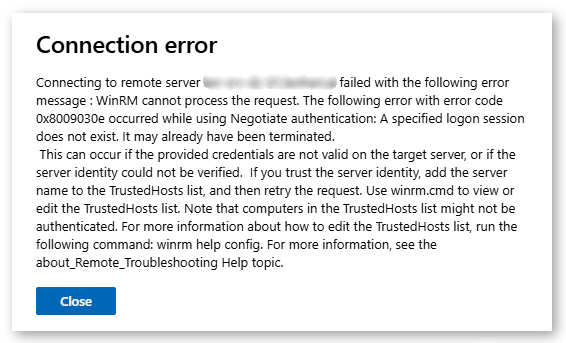
After adding the server to your WAC instance it is possible that you can’t connect right to it. If you get an error message similar to this one, some configurations have to be made.
Create a GPO
To be able to connect via WinRM to your hosts, the service has to be enabled and configured correctly. And here’s how. We have to configurethree things:
- Enable the WinRM service
- Open the firewall port (5985)
- Ensure the service auto-starts
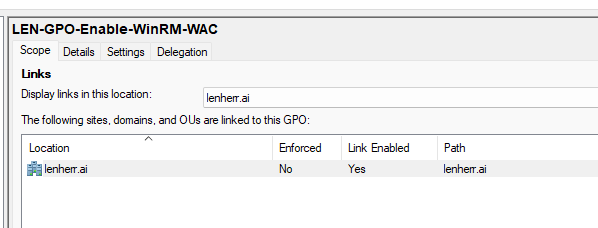
First we create a new GPO, in my case at the domain level, because I want that I have the ability to manage all my computers.
Enable the WinRM service
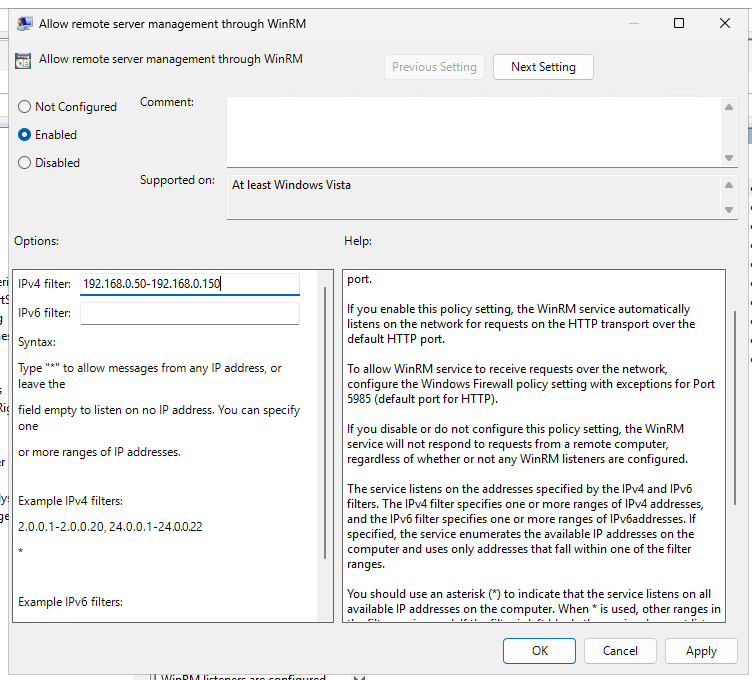
Under Computer Configuration > Policies > Administrative Templates > Windows Components > Windows Remote Management (WinRM) > WinRM Service, we set this GPO to Enabled.
Under IPv4 filter I recommend to set only the IP of your WAC instance for enhanced security.
Open the firewall port (5985)
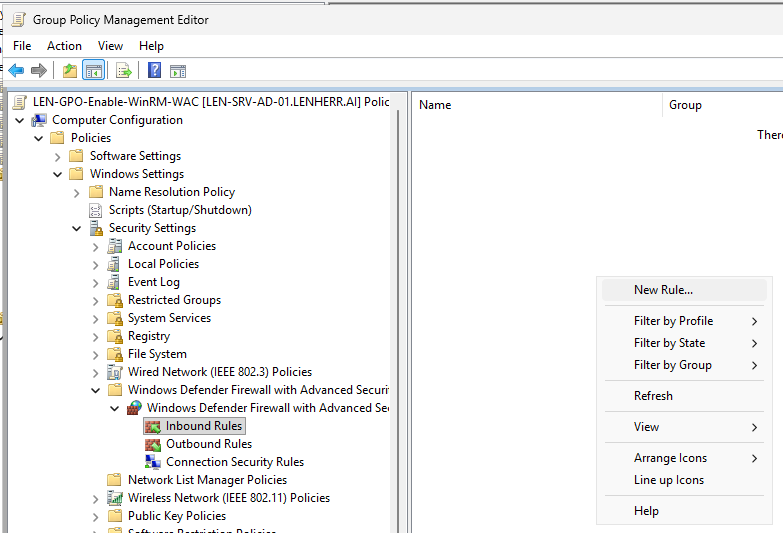
Under Computer Configuration > Policies > Windows Settings > Security Settings > Windows Defender Firewall with Advanced Security, we create a new inbound rule.
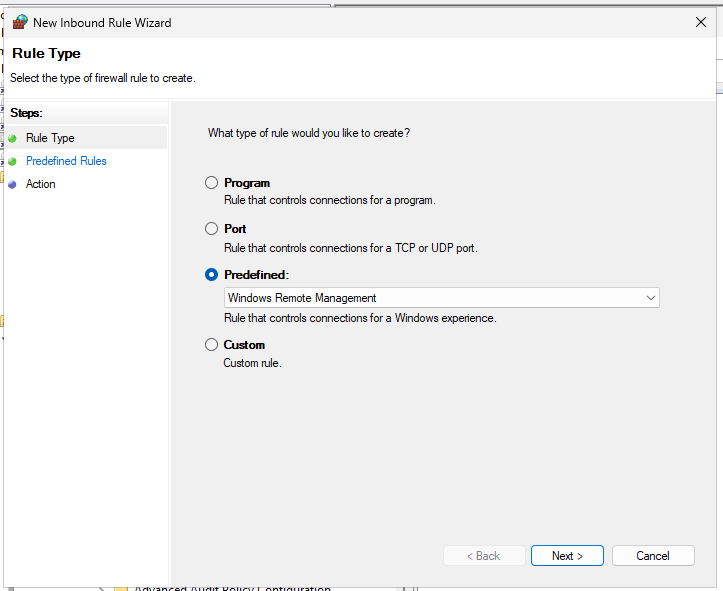
Under Predefined, we choose “Windows Remote Management”
We disable the public profile.

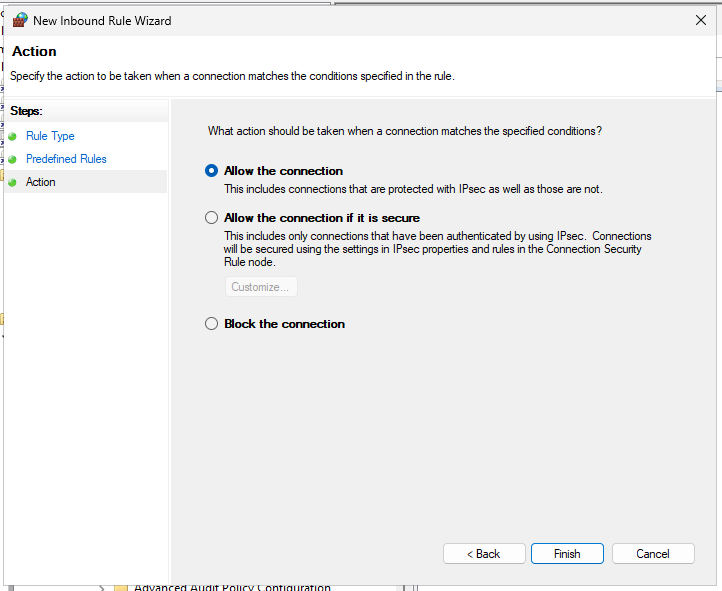
And allow the connection.
Ensure the service auto-starts
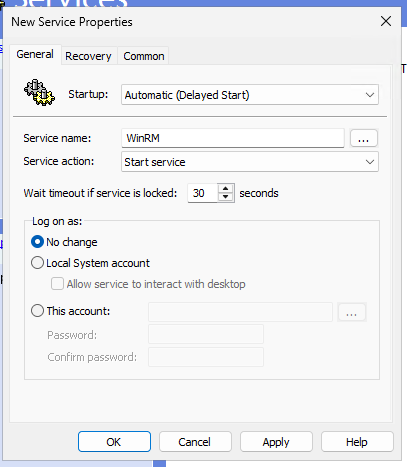
Under Computer Configuration > Preferences > Control Panel Settings > Services we create a new service.

We configure following settings:
- Startup: Automatic (Delayed Start)
- Service name -> seach with the three “…” for WinRM
- Service action: Start service
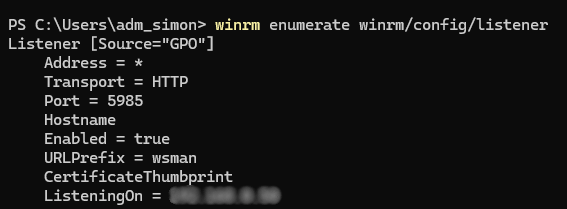
Now we open a new PowerShell prompt and force the GPO’s to update.
gpupdate /forceCode language: PowerShell (powershell)We test if the listener is running.
And on the WAC instance we test the connection as well.
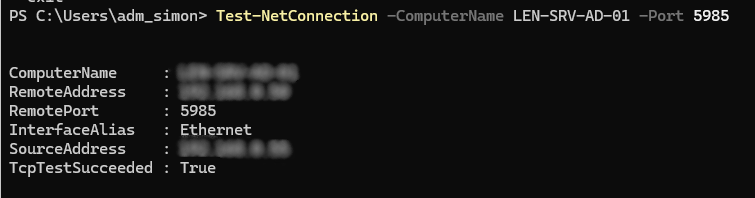
We test the connection in our WAC instance.
We finally configured a GPO which sets up the environment for beeing managed with Windows Admin Center!